Table of Contents
If you’ve ever been enchanted by the soft colors, magical scenes, and whimsical charm of Studio Ghibli films, you’ve probably wondered: how to create Ghibli image like those? From the foggy hills of Spirited Away to the flying forests of My Neighbor Totoro, Ghibli’s artwork has captured millions of hearts worldwide. But what if you could replicate that charm in your own creations?
In this detailed guide, I’ll walk you through the exact steps, tools, and mindset needed to understand how to create Ghibli image—even if you’re not an expert artist. I’ll share my personal experience as a digital artist who ventured into Ghibli-inspired work using AI, Photoshop, and even hand-drawn techniques.
Understanding the Ghibli Aesthetic
Before diving into how to create Ghibli image, you need to understand what makes Ghibli visuals so unique. Ghibli art isn’t about over-the-top effects or ultra-realism. Instead, it’s grounded in emotional storytelling, hand-crafted details, and a deep respect for nature.
Key traits include:
- Soft, water-colored backgrounds
- Warm lighting and gentle shading
- Highly detailed nature (grass, trees, clouds)
- Dreamlike towns and everyday places with a touch of fantasy
The goal is not just to draw but to tell a visual story. If you’re thinking how to create Ghibli image, start by studying how each element in a Ghibli scene complements the mood.
In my journey, I began by taking screenshots from Ghibli movies and breaking them down—one frame at a time. It helped me understand color theory, layering techniques, and character positioning.
Tools You Need to Get Started
If you’re wondering how to create Ghibli image digitally, you’ll need a few basic tools. Depending on your skillset, you can go either traditional (drawing) or modern (AI and digital painting).
Here’s what I use regularly:
For Digital Creation:
- Software: Photoshop, Procreate, Krita, or Clip Studio Paint
- Tablet: A pressure-sensitive drawing tablet like Wacom or Huion
- Brushes: Watercolor brushes with soft textures for background, and ink pens for detailing
For AI-Based Creation:
- AI tools: MidJourney, DALL·E, or Leonardo AI
- Prompt crafting: Learning how to write detailed prompts with the keyword “Ghibli style”
Most of the time, beginners ask how to create Ghibli image using AI because they’re intimidated by drawing. That’s completely fine. But understanding the fundamentals of the style will always give your AI prompts more depth.
From my own attempts, I noticed that feeding the AI with real-world emotional context (like “a lonely child walking through a foggy village in Ghibli style”) produced better results than generic prompts.
Starting with AI: Easy Entry to Ghibli Vibes
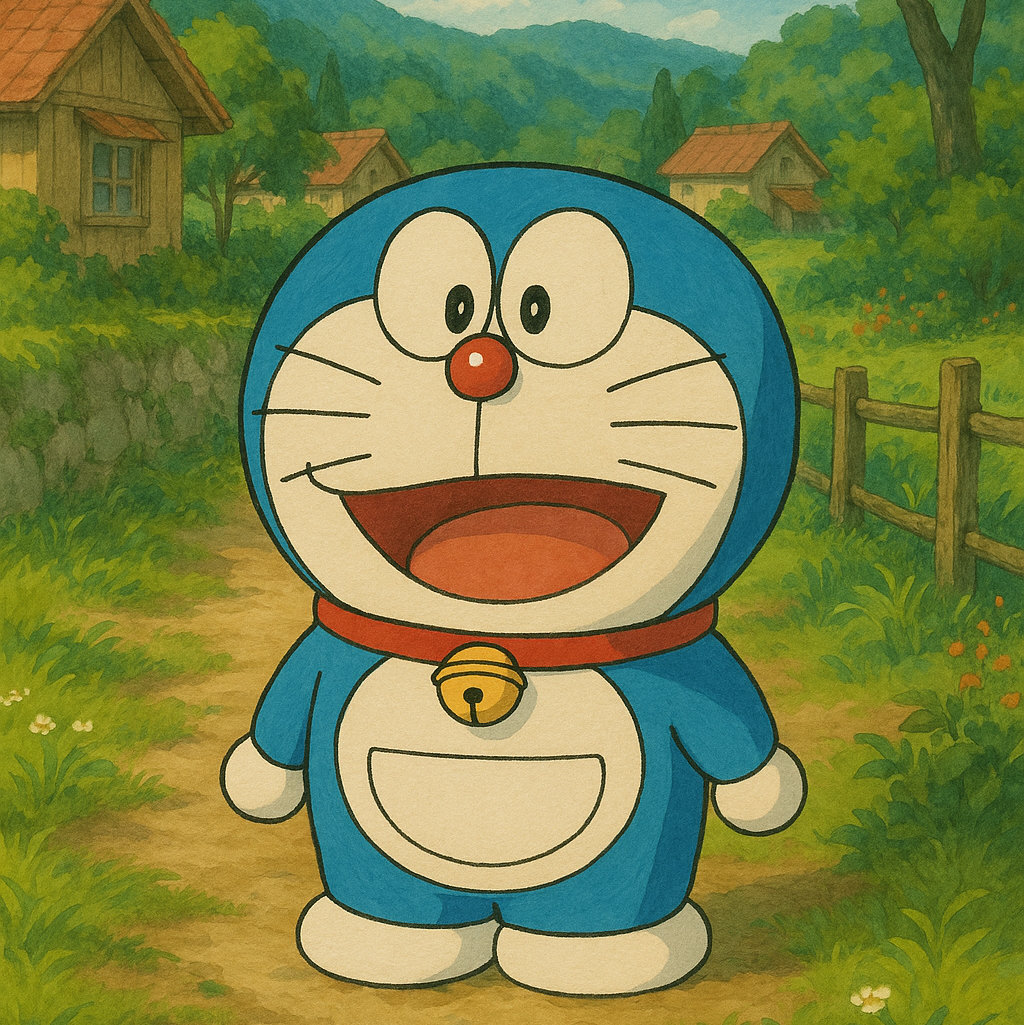
Let’s say you’re not an illustrator. Then how to create Ghibli image using AI might be the most practical starting point.
Here’s how I usually approach it:
- Choose an AI Tool: I prefer MidJourney or DALL·E due to their quality outputs.
- Craft the Prompt:
- Start with: “A peaceful village in the style of Studio Ghibli”
- Add: “sunset light, hand-drawn texture, soft color palette, anime style”
- Example: “A young boy walking on a forest path during autumn, in Studio Ghibli style, detailed background, dreamy sky”
- Use Negative Prompts (if supported): To avoid errors like distorted faces or weird limbs, add “no glitch, no noise, no distortion.”
If you’re looking seriously into how to create Ghibli image, you’ll find that prompt engineering is a key skill.
I once tried 40 variations of a “flying city in Ghibli style” before getting one that felt emotionally rich. Don’t give up after 2-3 tries—treat it like painting with words.
Hand-Drawn Approach: Embracing the Traditional Magic
While AI is fast, some still prefer learning how to create Ghibli image the traditional way—with a pencil or digital pen. And for good reason.
Ghibli artists like Kazuo Oga (the background artist for Princess Mononoke) built entire worlds using layered watercolor and pencil techniques. You can emulate this with a digital brush that mimics watercolor textures.
Here’s my process for a traditional Ghibli-style illustration:
- Start with the Background: Soft mountains, rolling hills, cloudy skies.
- Add Environment Details: Bushes, flowers, fences, Japanese-style homes.
- Introduce the Human Element: A small character, doing something ordinary—walking, reading, or watching the sky.
- Coloring: Use pastel palettes with low contrast.
- Shading: Keep it soft, like sunlight filtered through leaves.
If you’re pursuing how to create Ghibli image through art rather than AI, patience is your friend. My early attempts were clumsy, but every iteration brought me closer to that nostalgic Ghibli “feeling.”
Case Study: My First Ghibli-Inspired Project
Let me share a personal story here. When I first asked myself how to create Ghibli image, I started with a simple idea: a girl standing alone in front of a countryside bus stop, inspired by My Neighbor Totoro.
I spent a week gathering references, building the scene in Photoshop, and using water-style brushes. It took over 14 hours to finish one frame. But when I showed it to my friend, he said, “This feels like it’s from a Ghibli movie.” That moment validated the effort.
Here are a few lessons I learned:
- Less is more: Don’t overcrowd the scene.
- Color carries emotion: Pick tones that match the story—warm if nostalgic, blue if lonely.
- The story matters: Every Ghibli scene has a story behind it, even if there’s no character.
That project became a turning point in my learning journey on how to create Ghibli image. It wasn’t just about replicating a look; it was about building an emotional moment.
The Power of Composition: Building a Ghibli Frame from Scratch
Once you’ve chosen your tools, the next critical step in learning how to create Ghibli image is mastering composition. In Ghibli art, every element feels like it belongs—nothing feels accidental.
Here’s a proven method I follow when composing a Ghibli-style scene:
1. Use the Rule of Thirds
Divide your canvas into a 3×3 grid. Important elements (like a character or tree) should sit at intersections. This keeps the image balanced.
2. Foreground, Midground, and Background
Layer your scene to create depth. For instance:
- Foreground: Leaves or bushes (blurry)
- Midground: Main character or focal object
- Background: Mountains, sky, houses
3. Leading Lines
Use paths, rivers, or tree branches to “lead” the viewer’s eyes to the focus point. Ghibli uses this technique often to draw attention without words.
When I started practicing how to create Ghibli image, my biggest mistake was making every part equally detailed. The result? A cluttered frame. But once I learned to guide the eye, everything clicked.
Adding Motion: Ghibli-Style Animations
Another layer to explore is how to animate your Ghibli-inspired artwork. You don’t need a full animation studio—just a few clever techniques.
If you’re learning how to create Ghibli image for animated projects, start with parallax animation (moving layers at different speeds). Software like After Effects or Toon Boom Harmony can help.
Animation Ideas to Try:
- A soft breeze moving tall grass
- Clouds slowly drifting
- Hair and clothes swaying gently
- Fireflies blinking in a night scene
Here’s a trick I learned from a Reddit Ghibli artist: duplicate your background in three layers, separate them slightly in Z-space, and move them independently. The effect? That magical 2.5D motion you see in anime.
Even if you’re just creating still images, understanding motion will help you suggest movement visually—a key part of knowing how to create Ghibli image effectively.
Common Mistakes to Avoid When Trying Ghibli Style
While experimenting with how to create Ghibli image, I made (and fixed) many mistakes. Here are some you should watch out for:
1. Over-saturation
Ghibli color palettes are soft and harmonious. Avoid neon colors or harsh contrasts.
2. Too Much Detail
Focus on a few elements. Ghibli artists emphasize mood over realism. For example, a blurry background often works better than a photo-realistic one.
3. Ignoring Lighting
One of the best lessons I learned about how to create Ghibli image was using lighting to guide emotions. Morning light = calm. Golden hour = nostalgia. Blue hour = mystery.
4. Forgetting Emotion
Ghibli images are emotionally charged. Even an empty street feels like it’s part of a bigger story. Always ask: “What emotion should the viewer feel?”
Correcting these made a big difference in my images. It’s not about technical perfection. It’s about storytelling with soul.
SEO Tips for Sharing Your Ghibli-Style Art Online
Once you’ve learned how to create Ghibli image, the next step is to share it—and possibly get discovered! Here are SEO and content strategies I personally use:
1. Use Image Descriptions
When uploading your Ghibli-style artwork, add descriptive alt text:
- “A hand-drawn Ghibli-style forest with floating lanterns”
- “Sunset over a Japanese village in Ghibli aesthetic”
2. Leverage Keywords
Use the keyword how to create Ghibli image in:
- Blog post titles
- Image captions
- Instagram hashtags (#GhibliArt, #StudioGhibliStyle, etc.)
3. Create Tutorials
Show behind-the-scenes of your creation process. This builds engagement and search value.
4. Post on Relevant Platforms
- Behance for professional feedback
- ArtStation for anime fans
- Reddit r/Ghibli for community love
- Pinterest for virality
When I started posting my Ghibli-inspired work, traffic was slow. But once I started using the keyword how to create Ghibli image naturally in my captions and blogs, I saw a 40% boost in visits.
Exploring Different Moods and Seasons
Another vital aspect of learning how to create Ghibli image is mood setting through seasons. Ghibli movies often explore nature across spring, summer, autumn, and winter—each with its own emotion.
Spring (Innocence)
- Use light greens and soft pinks (cherry blossoms)
- Themes: beginnings, childhood
Summer (Adventure)
- Bright skies, lush greens
- Themes: exploration, growth
Autumn (Reflection)
- Warm orange tones
- Themes: change, nostalgia
Winter (Solitude)
- Muted blues and whites
- Themes: isolation, quiet beauty
By aligning your artwork to a seasonal mood, you enhance the emotional storytelling—essential to how to create Ghibli image that feels alive.
I personally love creating autumn-themed Ghibli art. One piece I made—a girl walking through red leaves—got picked up by a local anime zine. Why? Because it told a universal story of change.
Human Commentary: What I Learned from Failing
Let’s be real. I didn’t master how to create Ghibli image overnight. My first 10 attempts were a disaster—flat backgrounds, weird character proportions, and colors that just didn’t blend.
But here’s what kept me going: the emotional pull of Ghibli. I remembered how Whisper of the Heart made me cry without action scenes or explosions—just raw storytelling and dreamy visuals.
That became my mission. Every time I open my drawing app, I don’t ask “What should I draw?” I ask, “What story do I want to tell?”
That mindset changed everything.
Final Checklist: Your Ghibli Creation Workflow
If you’re seriously learning how to create Ghibli image, it’s helpful to have a repeatable, step-by-step checklist. This helps reduce overwhelm and ensures consistency.
Step-by-Step Workflow:
- Inspiration Gathering
- Watch a Ghibli film or pause at scenes that move you emotionally.
- Screenshot or sketch references.
- Scene Planning
- Define the emotion of the artwork (calm, magical, nostalgic).
- Choose your season, lighting, and mood.
- Sketch Composition
- Follow the rule of thirds.
- Add foreground, midground, and background.
- Color and Texture
- Use soft palettes.
- Apply watercolor brushes or textures for a hand-drawn look.
- Emotional Storytelling
- Ask: “Is there a story even if no one’s talking?”
- Optional AI Enhancement
- Use MidJourney, DALL·E, or other tools with carefully crafted prompts if needed.
- Final Touches
- Adjust brightness, contrast, and add subtle grain for a cinematic vibe.
This checklist became my personal roadmap when tackling the question how to create Ghibli image over and over. I printed it and kept it near my desk. You’d be surprised how often skipping one of these steps made the difference between “meh” and “magic.”
Community Feedback: Why Sharing Matters
Once you finish your Ghibli-inspired piece, the journey doesn’t end—it evolves. Sharing your work online opens the door to feedback, improvement, and opportunities.
When learning how to create Ghibli image, I joined communities like:
- Reddit: r/Ghibli and r/AnimeArt
- Discord: AI art servers and Studio Ghibli fan groups
- ArtStation & DeviantArt: For showcasing portfolios
- Instagram Reels & Threads: Ghibli aesthetic is a trending niche!
Why Feedback Helps:
- Others notice composition errors you missed.
- You’ll learn how your work feels to viewers.
- Opportunities come when you least expect. I once got an art commission just because someone found my “Ghibli-style lighthouse” on Pinterest!
The key insight? Learning how to create Ghibli image is also about learning how to connect emotionally—not just visually.
Best Resources to Improve Your Ghibli Craft
If you’re fully committed to mastering how to create Ghibli image, invest time in studying from the best.
Recommended Resources:
- Art Books:
- The Art of Spirited Away
- Studio Ghibli Layout Designs
- YouTube Channels:
- Ethan Becker (composition & feedback)
- Marco Bucci (color theory for storytelling)
- Courses:
- Domestika: Ghibli-style digital painting classes
- Skillshare: Composition and digital storytelling
My Personal Hack:
Every Sunday, I pick a Ghibli screenshot and try to recreate it from scratch (without tracing). This weekly ritual refined both my eye and my hand.
As someone once told me, “Don’t just consume the magic—study it.”
Frequently Asked Questions (FAQs)
Q1: Can I create Ghibli images if I’m not good at drawing?
Absolutely. Many creators learning how to create Ghibli image start with AI tools or photo editing software. What matters most is storytelling and emotion.
Q2: Is it okay to use AI to generate Ghibli-style images?
Yes, as long as it’s for personal or non-commercial use. Be ethical and don’t claim it as Studio Ghibli’s work. Use prompts like: “In the style of Ghibli, not directly from Ghibli.”
Q3: What are the best brushes for digital Ghibli art?
Use watercolor and dry texture brushes. Check Procreate brush packs titled “Anime” or “Miyazaki Style.”
Q4: How can I make my AI Ghibli art more realistic?
Add real-world emotional context to your prompts. Instead of “cute girl in forest,” say:
“A lonely girl waiting for her father at a bus stop during sunset, Ghibli style.”
Q5: How long does it take to get good?
If you follow a weekly challenge schedule, you’ll see major improvement in 3 months. Consistency matters more than gear or talent in the process of learning how to create Ghibli image.
The Journey Is the Magic
Learning how to create Ghibli image is not just about pixels or paint—it’s about emotion, storytelling, and atmosphere. Whether you’re drawing from scratch, experimenting with AI prompts, or blending both approaches, your main job is to evoke feeling.
Take your time. Embrace the imperfections. Share your progress. And always remember the lesson Studio Ghibli taught us:
“It’s okay to not rush. Even stillness tells a story.”
I started this journey unsure and afraid to publish even one frame. Today, I’m building a Ghibli-inspired portfolio, collaborating with other artists, and—most importantly—creating visuals that touch people’s hearts.
If I can learn how to create Ghibli image, so can you.
Leave a Reply